myassis
Member
 Resisting Entropy to the best of my ability.
Posts: 22
|
Post by myassis on Mar 1, 2022 5:23:21 GMT -5
I'd REALLY like input from those for whom working on P-35s is almost instinctive. My Kareen-built P-35 (AND my right thumb) is in need of an extended thumb safety (no, I DO NOT want an SFS). I'd like to use the C&S extended slide safety, and fit it (if necessary) to the Kareen. I'm just wondering how much fitting I'm likely to be looking at.
I get the impression that here, as with most things, there's no free lunch. I surmise that the more a gun part is made to be "drop in" the more things can end up being unsatisfactory with it, either immediately after installation or over time. Is this a modification best done by a professional gunsmith (as with sight installation)? Or can someone with reasonable intelligence, manual dexterity, tool familiarity, and patience install one of these, without wrecking the pistol or the new safety?
I'm a HUGE believer in "measure LOTSA, cut little", and I know when and how to "walk away" from something when frustrated, and reconsider all moves made.
I guess I'm also wondering if the internal dimensions of the Kareen pistols are different enough from a Belgian or Portuguese P-35 that they might affect how I should approach the installation.
Any and all input is appreciated.
|
|
|
|
Post by ToddSig on Mar 1, 2022 12:47:14 GMT -5
It is not that difficult, it just takes a little patience. There is some filing, so not a true drop in part. And, although not difficult, it usually takes a few filing attempts before the proper fit is obtained. After each small removal of material, you need to refit the safety and check the clearance. Not difficult, but you are asembling and disassembling the safety and sear spring, hammer, sear etc in checking the fit and proper action. Again, not difficult, but a little time consuming. You do get to be pretty good at installing the safety, and sear etc. Below are the C&S installation instructions for their extended safety. Let me know if you have any questions or if you cant read them. Also, should you have any questions, contacting C&S has always been a positive experience. Call or email their technical support and you will get a response. 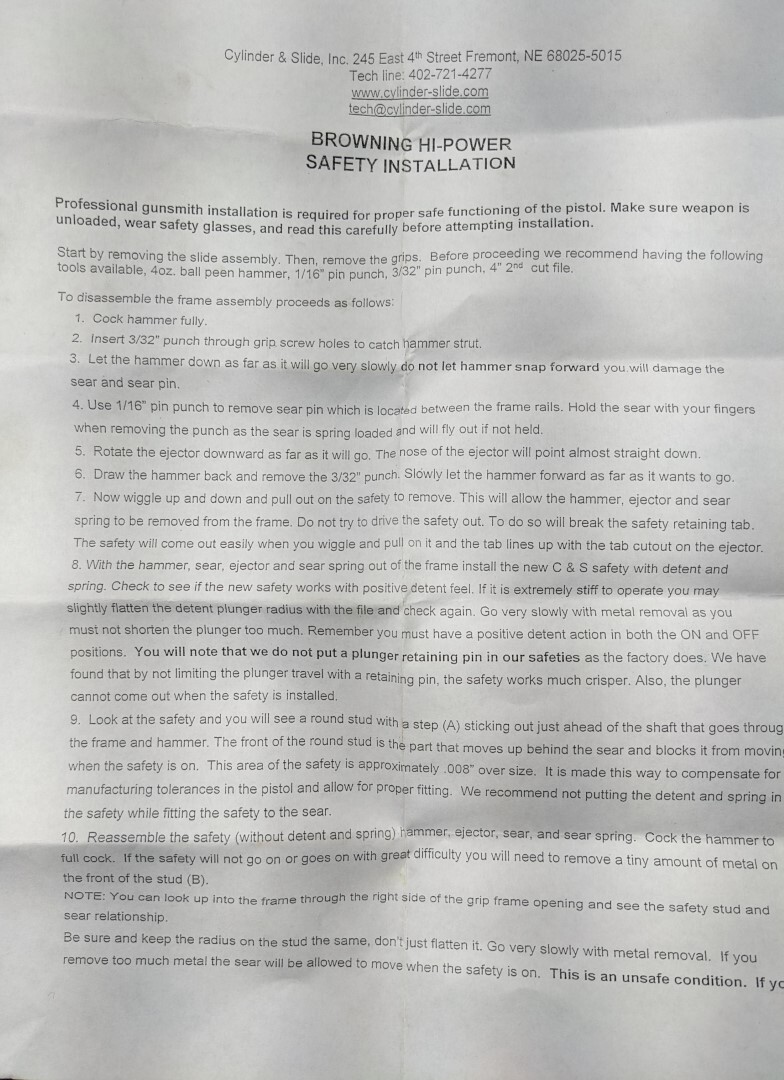 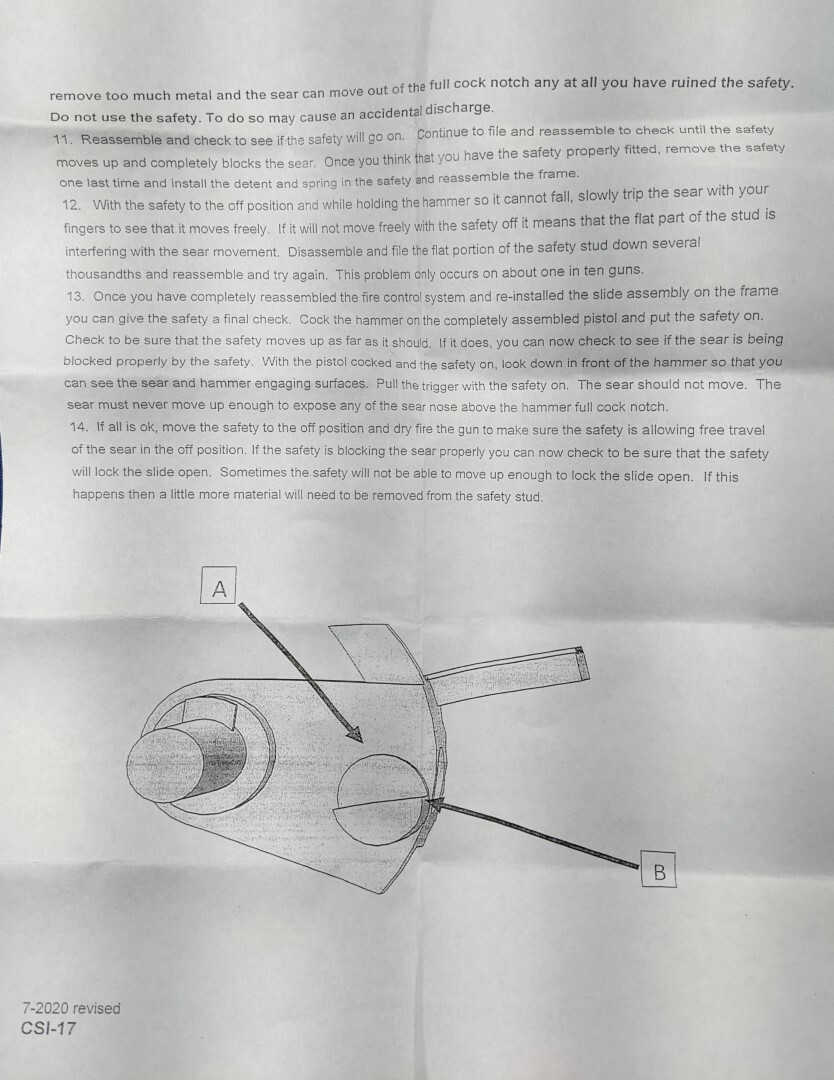 |
|
myassis
Member
Resisting Entropy to the best of my ability.
Posts: 22
|
Post by myassis on Mar 7, 2022 23:44:25 GMT -5
Thanks for this information, and apologies for not acknowledging before now. I've been reading the install procedure, very kindly sent by ToddSiG, and trying to be sure that I fully understand all nuances before embarking on the project. Well, that, and cleaning off my gunsmithing space (and devising a make-shift "sear pin catcher/retriever", just in case), before things get serious.
|
|
|
|
Post by ToddSig on Mar 8, 2022 11:23:56 GMT -5
Thanks for this information, and apologies for not acknowledging before now. I've been reading the install procedure, very kindly sent by ToddSiG, and trying to be sure that I fully understand all nuances before embarking on the project. Well, that, and cleaning off my gunsmithing space (and devising a make-shift "sear pin catcher/retriever", just in case), before things get serious. Glad the installation sheet was helpful. I found installing the safety before any filing, as the installation sheet notes, bottom of page one, look through the right side of the grip frame opening, inside and try to engage the safety and observe the relationship and movement of the safety stud to the sear. You get a better idea of where to file, and about how much material to remove. Then, remove and start to remove metal from the stud. After a few installation attempts, you will be an expert at installing the safety and sear, sear spring etc. Good luck. |
|


